Deciding on moving your WordPress site to new hosting is a big step. It often starts with a nagging feeling that you’ve outgrown your current setup. Maybe your site feels sluggish, customer support is slow to respond, or the costs keep creeping up. Whatever the reason, if you're feeling frustrated, it’s probably time for a change.
The thought of a website migration can feel a bit intimidating, but we’re here to walk you through it. Think of this as a helpful conversation, not a dense technical manual. With a little preparation, the long-term benefits of a better host almost always outweigh the short-term effort.
Is It Time to Change Your WordPress Host?
Feeling stuck with your web host is a common story. Many of us start by picking a hosting plan based on the lowest price, only to realise later that performance, security, and good support are what truly matter. A slow website doesn't just test your visitors' patience; it can harm your search engine rankings and, more importantly, your business. If your pages take forever to load or your site frequently goes down, you're not just losing casual visitors—you're losing potential customers.
Key Triggers for a Hosting Change
For many businesses, the decision to switch hosts often comes down to a few key issues that directly impact user experience and growth. Spotting these red flags early can save you a lot of headaches down the road.
It’s often a combination of things, but some of the most common motivations include:
- Poor Site Performance: Your website feels sluggish, even after you’ve diligently optimised images and set up caching plugins.
- Lacklustre Customer Support: Getting help feels like a chore, with long waits and unresolved tickets leaving you stuck.
- Security Concerns: Your current host is light on security features, lacking essentials like regular malware scans or a free SSL certificate.
- Better Value Elsewhere: You’ve spotted another provider offering more features or better performance for a similar, or even lower, price.
The WordPress hosting market is full of providers tailored for different needs, with a strong focus on speed and reliability. Choosing a host that aligns with your audience's location can give your site a noticeable speed boost, which is a massive win for both SEO and user satisfaction.
Here's a quick look at the main reasons you might be considering a move. This can help you pinpoint exactly what's not working with your current provider.
Key Reasons to Change Your WordPress Host
A summary of the primary motivations for migrating a WordPress site, helping you evaluate your current hosting situation.
| Motivation | Why It Matters for Your Business |
|---|---|
| Slow Speeds | A slow site frustrates visitors and can hurt your rankings on Google. |
| Poor Support | Unreliable support means more downtime, which can directly cost you sales and damage your reputation. |
| Security Gaps | A lack of proactive security leaves your customer data vulnerable and erodes trust. |
| Rising Costs | High renewal fees for subpar service eat into your profits without delivering real value. |
| Limited Features | Your host might lack features like staging sites or automatic backups, hindering your ability to grow. |
Ultimately, this isn't just about finding a new server; it's about finding a hosting partner that actively supports your business goals.
A better hosting environment isn't just a technical upgrade; it's a strategic business decision. Faster load times and improved reliability directly contribute to a better customer experience and stronger brand reputation.
If your current host feels more like a roadblock than a partner, it's definitely time to see what else is out there. For those thinking about making the switch, understanding what the best managed WordPress hosting can do for your site will make the decision a lot clearer.
Your Pre-Migration Safety Checklist
Jumping straight into a website move without any prep is like setting off on a long road trip without checking your tyres or fuel. A successful migration doesn’t start when you transfer the first file; it begins with a solid, reassuring plan.
Think of this pre-migration checklist as your safety net. Walking through these simple but crucial steps will help you sidestep the most common headaches, like lost data, unexpected downtime, or that sinking feeling when you realise something important was left behind.
Choose Your New Hosting Partner
Before you pack up your site, you need to know where you're going. When picking a new host, look beyond the price tag. Your real goal is to find a partner who genuinely supports your site's need for speed, security, and reliability.
Here's what we always recommend looking for:
- Location Matters: Hosting your site on servers physically closer to your visitors can make a real difference to your loading speeds. It’s a win for user experience and a nice boost for your SEO.
- Performance and Resources: Don’t just take their word for it—check independent reviews for real-world speed tests. Make sure the plan you choose has enough storage and bandwidth to handle your current traffic and allow for future growth.
- Expert Support: Sooner or later, you'll need help. Look for hosts known for their responsive and knowledgeable support teams. You'll be grateful for them if you hit a snag in the middle of your move.
Perform a Full Site Audit and Cleanup
Moving your WordPress site is the perfect excuse for a bit of spring cleaning. Over time, websites accumulate digital clutter: unused plugins, old theme files, and endless draft posts. All this baggage can slow your site down and even create security vulnerabilities.
A clean site is smaller, faster, and much easier to migrate. Start by deactivating and deleting any plugins and themes you no longer use. It’s also a great time to clear out old post revisions and tidy up your media library. Think of it as packing only the essentials.
A smaller, cleaner website isn't just simpler to move—it's also less likely to encounter errors during the migration process. Taking an hour to tidy up now can save you several hours of troubleshooting later.
Create a Complete and Secure Backup
Okay, this is the most important step of all. Please don’t skip this. Before you touch anything, you absolutely must create a complete backup of your entire website. This isn’t just a precaution; it’s your lifeline if anything goes sideways.
Your backup needs to have two key parts:
- Your WordPress Files: This includes everything in your
wp-contentfolder—themes, plugins, and all your media uploads. The easiest way to get these is with an FTP client like FileZilla. - Your WordPress Database: This is the heart of your site. It holds all your posts, pages, comments, user information, and settings. Most hosting control panels have a tool called phpMyAdmin that lets you export your database as an SQL file.
Once you have both the files and the database export, download them to your computer. For extra peace of mind, we recommend uploading a copy to a separate cloud storage service like Dropbox or Google Drive. With a clean site and a secure backup, you're ready for a smooth, worry-free migration.
Taking the Reins: The Manual WordPress Migration
If you're not afraid to get your hands a little dirty, tackling a WordPress migration manually gives you complete control over the entire process. It might sound intimidating, but it's a great way to understand the moving parts of your website.
Your website is made of two key components: the files (themes, plugins, images) and the database (all your content and settings). The manual method is simply the process of moving these two parts to their new home and reconnecting them. Let's break it down in simple terms.
Packing Up Your Site: Files and Database Export
First, you need to pack up your site. This starts with getting a copy of all your WordPress files. The go-to tool for this is an FTP (File Transfer Protocol) client. A great, free option is FileZilla. You'll use it to connect to your current host's server and download the entire folder where your WordPress site lives—usually called public_html or something similar.
With the files sorted, it's time for the database. Head into your current host's control panel and look for a tool called phpMyAdmin. Once inside, select the database linked to your WordPress site and click the "Export" tab. This will let you download a single .sql file, which is a complete snapshot of all your content.
Setting the Stage on Your New Hosting
Now that you have your files and database saved on your computer, it's time to prepare the new hosting environment. The first step on the new server is to create a fresh, empty database. Your new host’s control panel (like cPanel) will have a "MySQL Databases" tool, which usually has a wizard to walk you through it.
During this step, you'll create three things:
- A new database name
- A new database user
- A strong password for that user
Jot these three details down somewhere safe. You're going to need them in the final step.
Once that's done, open your FTP client again, but this time connect to your new server. Upload all the website files you downloaded earlier. After the upload finishes, go back to phpMyAdmin on your new host, select the empty database you just created, and use the "Import" function to upload the .sql file.
The whole process requires a bit of forethought. As the flow below shows, a good move always starts with solid planning.
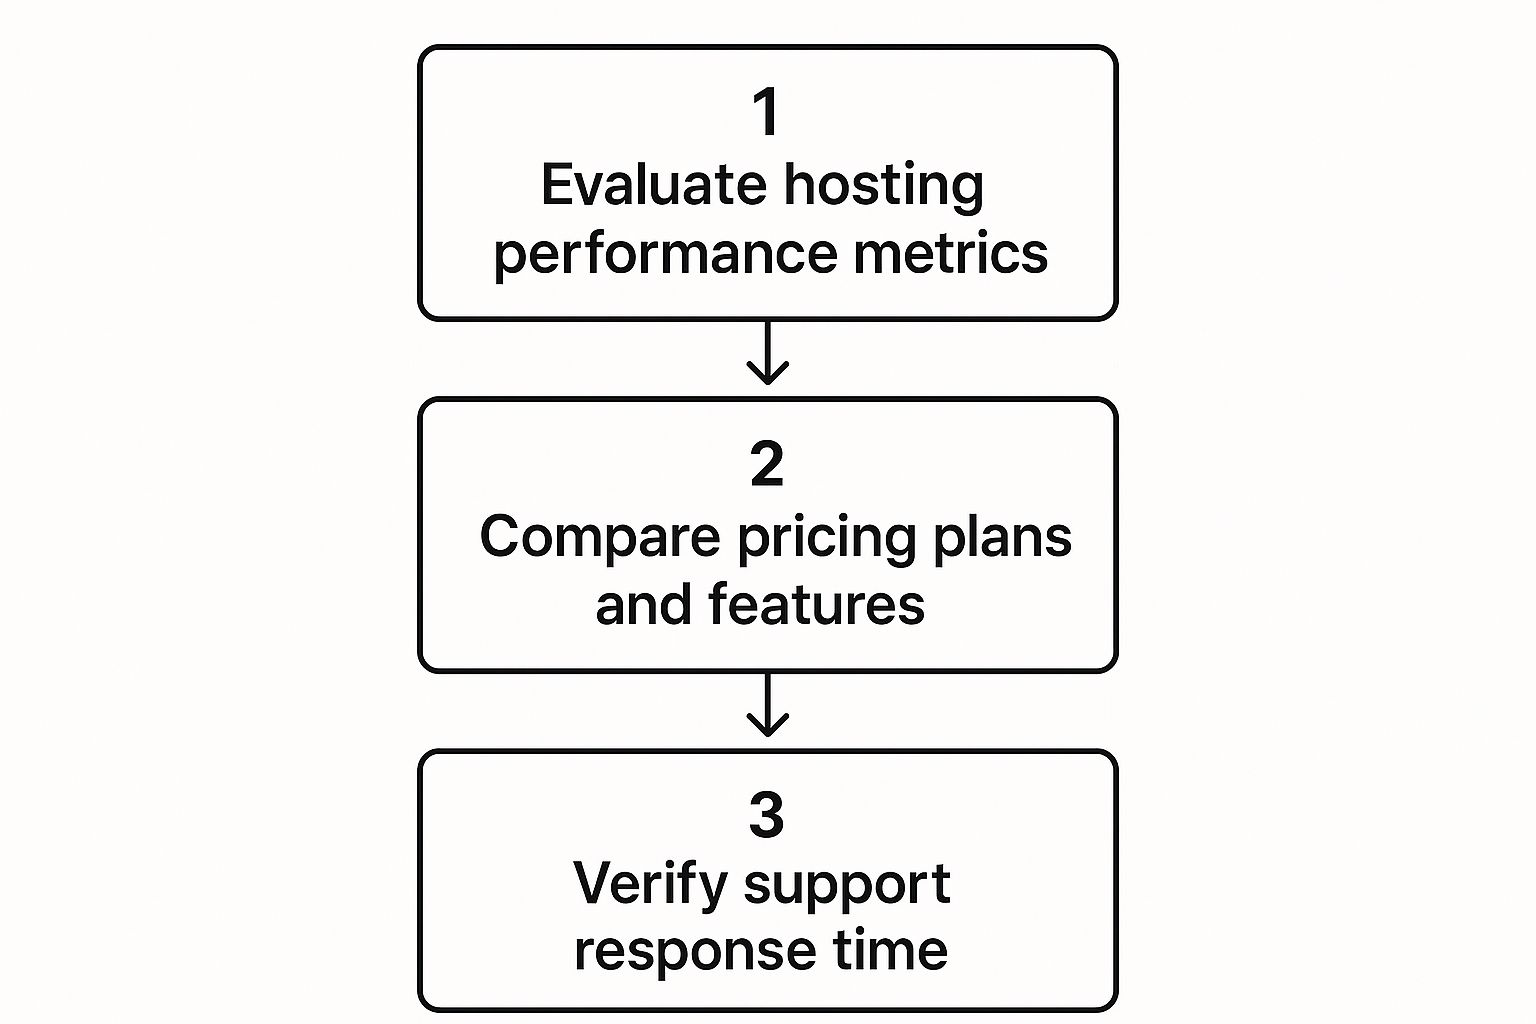
This really drives home the point that a successful migration hinges on planning ahead and choosing the right hosting partner based on performance, cost, and support.
The Final Handshake: Reconnecting WordPress
This is the last, and most critical, piece of the puzzle: telling WordPress how to connect to its new database. This connection is defined in a single file called wp-config.php, which you'll find in the main folder of the files you just uploaded.
Open this file with a text editor. You're looking for these specific lines:
DB_NAME – Replace the old value with your new database name.
DB_USER – Replace this with your new database username.
DB_PASSWORD – And finally, put your new database password here.
Carefully update these three fields with the new details you created earlier and save the file. That's it! Your WordPress files can now talk to the database on your new server.
Getting comfortable with these steps is incredibly empowering. If you want to dive even deeper, our detailed guide on moving a WordPress site to a new server breaks it down even further. Manual moves demand attention to detail, so taking your time here is key to a smooth switch.
Let a Plugin Do the Heavy Lifting
If the thought of FTP and phpMyAdmin makes your head spin, don't worry. There's a much simpler way. The WordPress community has developed brilliant plugins that handle the entire migration process for you. It’s the perfect example of working smarter, not harder.
Think of these plugins as expert movers for your website. They neatly pack up everything—your files, database, themes, and other plugins—into a single package. You then simply upload this package to a fresh WordPress installation on your new host, and the plugin unpacks it all, putting everything back exactly where it should be. It’s a far less intimidating way to move your site.
Choosing Your Migration Sidekick
While there are plenty of options, two plugins have consistently stood the test of time: All-in-One WP Migration and Duplicator. They both get the job done but have slightly different approaches.
- All-in-One WP Migration: This one is a crowd-pleaser because of its simplicity. Its drag-and-drop interface makes it a breeze for beginners and smaller sites. The free version has an upload size limit, which can be a factor for bigger websites, but for most people, it's perfect.
- Duplicator: Often a favourite among developers, Duplicator offers a bit more control. It bundles your site with a dedicated installer script, making the process incredibly robust. This is especially useful for large, complex sites where other methods might time out.
The real beauty of using a plugin is that it dramatically reduces the chance of human error. By automating the backup and restoration, these tools ensure no files get left behind and that all the database details are updated correctly.
Let's take a quick look at All-in-One WP Migration. It's a great starting point for most people because it's so intuitive.

As you can see from its official WordPress plugin page, it boasts over 5 million active installations and fantastic user reviews. That kind of social proof speaks volumes about its reliability and ease of use.
The Typical Plugin Migration Flow
No matter which plugin you choose, the general steps are reassuringly similar. The process is designed to be straightforward, guiding you from one stage to the next without technical jargon.
Here’s what you can expect the workflow to look like:
- Install the plugin on your current website—the one you want to move.
- Generate a package by following the on-screen instructions. This will bundle your entire site into a single file for you to download.
- Set up a blank slate by installing a fresh, empty copy of WordPress on your new hosting account.
- Import your site by installing the same migration plugin on the new, empty site. Use its import feature to upload the package file. The plugin will then take over, restoring your site and overwriting the blank installation.
This approach transforms what could be a complex technical task into a few simple, manageable clicks.
Going Live and Final Post-Migration Checks
You’ve done the heavy lifting, and your site is now sitting comfortably on its new server. The last major step in moving your WordPress site to new hosting is pointing your domain to its new home and then giving everything a final check. This is the moment you finally flick the switch.
This step involves updating your domain's DNS settings. Think of DNS (Domain Name System) as the internet's giant address book. Right now, it’s directing everyone to your old host. We just need to update that entry to point to the new server instead.
Your new hosting provider will give you their nameservers. All you need to do is log in to your domain registrar (where you bought the domain, like GoDaddy or Namecheap) and swap the old nameservers for the new ones. It sounds technical, but it’s usually a simple copy-and-paste job.
Navigating the DNS Propagation Period
After you update your nameservers, you enter a waiting period known as DNS propagation. This is simply the time it takes for the internet's address book to get updated across the globe. It can take anywhere from a few minutes to 48 hours, but in our experience, it's often much faster.
During this window, some of your visitors might land on the old site while others get sent to the new one. Because of this, we always advise holding off on making any changes to the site. Just let the internet catch up.
Your Post-Migration Safety Checklist
Once you've confirmed your site is loading from the new host, it's time for one last, crucial task: a thorough check of everything. This is your final safety net to ensure the transition is seamless for your visitors and that you don't lose any hard-earned SEO.
Please don't skip this part. A few minutes of checking now can save you from lost traffic or frustrated customers later on.
Here’s a practical checklist to run through:
- Test Your Main Pages and Links: Click through your main navigation, header, and footer links. Visit a few key pages and blog posts to hunt down any broken links (those dreaded 404 errors).
- Check Your Forms: Fill out your contact form, newsletter sign-up, or any other forms on your site. Did the notification email arrive in your inbox?
- Verify Your SSL Certificate: Check for the padlock icon in your browser's address bar on every page. Confirm your site is forcing a secure HTTPS connection.
- Review Your Media: Do a quick spot-check to see if your images, videos, and any downloadable files are all loading correctly.
- Check Admin Functionality: Log into your WordPress dashboard. Can you save a post? Upload an image? Are all your plugins behaving as expected?
Running these final checks ensures that the transition to your new host is completely invisible to your users. A successful migration is one that nobody even notices happened.
The widespread use of WordPress underscores why these checks are so important. As of early 2025, WordPress powers a staggering 43.4% of all websites, showing just how many people rely on it running smoothly. For a deeper look into its market dominance, you can discover more insights about WordPress usage on invedus.com.
Taking these final, careful steps ensures your website continues to function perfectly after its big move. If you'd like a broader overview, check out our complete guide on WordPress website migration.
You've Got This!
Moving to a new host can feel like a big project, but by breaking it down into manageable steps, it becomes much less daunting. Whether you choose the manual route or a handy plugin, the key is preparation and careful checking. By choosing a better hosting partner and ensuring a smooth transition, you're setting your website up for better performance, stronger security, and future growth.
If you’ve followed along, you should now have the confidence to tackle your own migration. Should you have any questions or need a hand, feel free to contact us to learn more.